


JavaScript HTML DOM manipulation is a foundational concept in web development, enabling developers to create dynamic and interactive web pages.
In this article, we will explore the basics of JavaScript HTML DOM manipulation, starting from selecting elements within the DOM using various methods, modifying their properties and content, creating new elements dynamically, event Handling, styling Elements, and Error Handling.
So, let’s dive in and unlock the power of JavaScript HTML DOM manipulation to create dynamic and interactive web pages!
PermalinkWhat is the HTML DOM?
The HTML DOM (Document Object Model) is a programming interface for web documents. It represents the structure of an HTML document as a tree-like structure, where each element, attribute, and text node is an object. With JavaScript and the HTML DOM, you can manipulate, traverse, and modify the content, style, and behavior of HTML elements on a web page.
PermalinkList of some important concepts related to JavaScript HTML DOM:
Accessing HTML Elements
Modifying HTML Elements
Creating and Appending Elements
Event Handling
Styling Elements
Error Handling
Let’s understand them one by one:
Permalink1) Accessing HTML Elements:
One of the fundamental tasks in DOM manipulation is accessing HTML elements using JavaScript. There are multiple methods available to select elements based on different criteria. Let’s explore some of these methods:
Permalinka) getElementById:
This method allows you to select an element by its unique ID attribute. For example, if you have an HTML element with the ID “myButton”, you can access it using the following code:

Permalinkb) getElementsByClassName:
This approach permits you to target elements by their class name. It returns a collection of elements with the specified class. For example, if you have multiple elements with the class “className”, you can access them using the following code:

Permalinkc) querySelector:
This method is a powerful selector that allows you to select elements using CSS-style selectors. It returns the first matching element. Here's an example:

For instance, if you want to select the first paragraph element with the class "content", you can use the following code:

Permalinkd) getElementsByTagName:
This method allows you to select elements based on their tag name. It returns a collection of elements with the specified tag name like this:

For example, if you want to select all the paragraph elements in the document, you can use the following code:

Permalinke) querySelectorAll:
Similar to querySelector, this method also uses CSS-style selectors to select elements. However, unlike querySelector, it returns all matching elements as a NodeList. Here's how you can use it:

For instance, if you want to select all the elements with the class "content", you can use the following code:

Permalink2) Modifying HTML Elements:
Modifying HTML elements using JavaScript and the HTML DOM (Document Object Model) allows you to dynamically manipulate the content, attributes, and styles of elements on a webpage. Following are some of the methods to modify HTML elements:
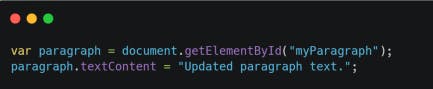
Permalinka) Modifying Text Content:
To modify an HTML element, you first need to access it using several methods of JavaScript such as getElementById, getElementsByClassName, getElementsByTagName, querySelector, and querySelectorAll as discussed above.
After accessing an HTML element, you can change the text content of an HTML element using the textContent property. This property allows you to update the plain text inside an element. like this:

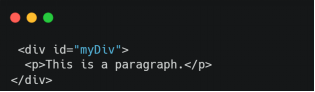
And the output of the above code is:

Permalinkb) Modifying HTML Content:
If you want to modify the HTML content of an element, including tags and structure, you can use the innerHTML property. This property allows you to set or get the HTML content of an element.

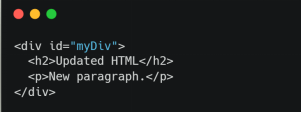
This is the output of the above code :
Permalinkc) Modifying Attributes:
You can modify the attributes of an element using the setAttribute method. This method allows you to set or update the value of an attribute like this.

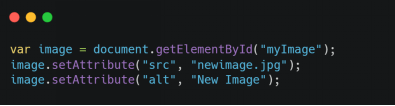
And the output of the above code is:

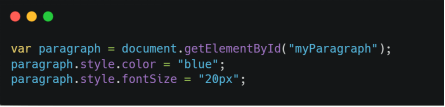
Permalinkd) Modifying CSS Styles:
To modify the CSS styles of an element, you can access its style property and update individual style properties like this:

Permalink3) Creating and Appending Elements
Creating and appending elements in JavaScript using the HTML DOM (Document Object Model) allows you to dynamically generate new elements and add them to the HTML structure of a webpage. Following are some methods with simple examples to help you understand creating and appending elements:
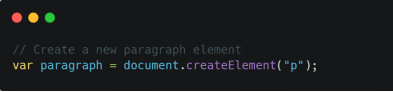
Permalinka) Creating Elements:
To create new elements, you can use the createElement method. This method allows you to create an element with the specified tag name.
Permalinkb) Modifying Element Properties:
Once you have created an element, you can modify its properties such as textContent, innerHTML, id, className, or any other attribute using the corresponding properties and methods.
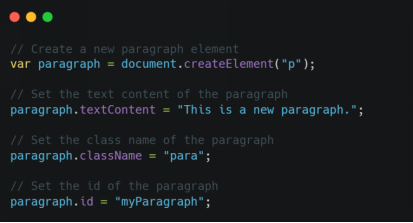
A new element is created with the ID "myParagraph" and the class name "para". The paragraph's text content is set to "This is a new paragraph.".

Permalinkc) Appending Elements:
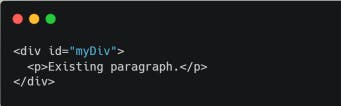
After creating an element and modifying its properties, you can append it to the HTML structure using various methods. The most commonly used methods are appendChild and insertBefore.
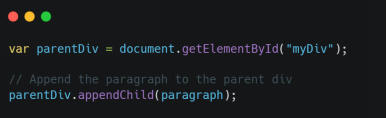
appendchild:
With the appendChild method, you can attach the element as the last child of the parent element like this:
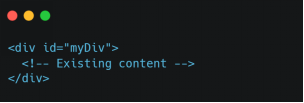
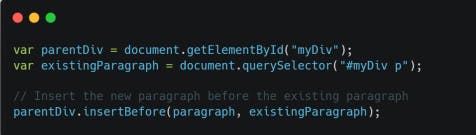
insertBefore: This method inserts the element before a specified reference element. For example:
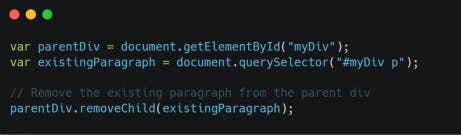
Permalinkd) Removing Elements:
If you need to remove an element from the HTML structure, you can use the removeChild method. This method removes a specified child element from its parent like this:
Permalink4) Event Handling:
Event handling in JavaScript with the HTML DOM (Document Object Model) allows you to respond to user interactions or other events that occur on a webpage. Here's an explanation with simple examples to help you understand the process:
Permalinka) Event Types:
Events can be triggered by various actions, such as a user clicking a button, hovering over an element, submitting a form, or even the page finishing loading. Some common event types include click, mouseover, submit, keydown, and load. You can attach event handlers to these events to execute JavaScript code when the event occurs like this:


The code attaches a click event listener to the button element. When the button is clicked, an alert dialog will appear with the message "Button clicked!”. This functionality enables you to react to the button click event, execute particular actions, or present information to the user.
Permalinkb) Attaching Event Handlers:
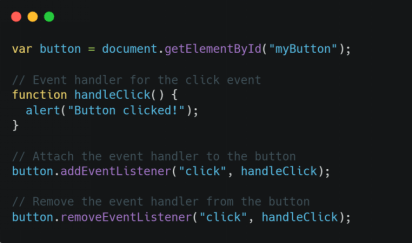
To attach an event handler to an element, you can use the addEventListener method as a first parameter, this method accepts the event type, and as the second parameter, it expects a callback function. The callback function is executed when the event is triggered. Here is an example:
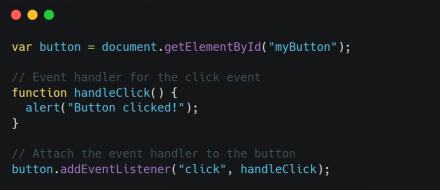
This code defines a function handleClick that will be executed when the button is clicked. The addEventListener method is then used to attach the handleClick function as the event handler for the button's click event. When the button is clicked, the function handleClick will be called, and an alert dialog will appear with the message "Button clicked!".You can utilize this feature to handle the button click event and execute custom logic defined within the handleClick function.
Permalinkc) Event Object and Event Propagation:
When an event occurs, an event object is automatically passed to the event handler function. This object provides information about the event, such as the target element and event-specific details. Events also propagate through the DOM hierarchy, from the target element to its parent elements. This phenomenon is commonly referred to as event propagation or event bubbling
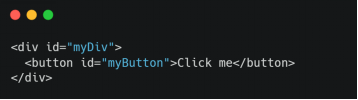
The above code attaches event handlers to the button and div elements.
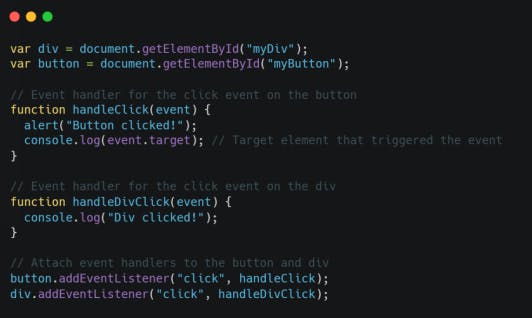
The handleClick function is the event handler for the button's click event. When the button is clicked, it will trigger an alert dialog with the message "Button clicked!" and log the event. target to the console. The event. target represents the element that triggered the event, in this case, the button element.
The handleDivClick function is the event handler for the div's click event. When the div is clicked, it will log the message "Div clicked!" to the console.
By attaching event handlers to these elements, you can respond to their respective click events and execute custom logic based on the event that occurred.
Permalinkd) Removing Event Handlers:
If you no longer need an event handler, you can remove it using the removeEventListener method. This method requires the same event type and a callback function that was used to attach the event handler.
This code first attaches the handleClick function as an event handler to the button's click event using addEventListener. However, it then immediately removes the event handler using removeEventListener with the same event type ("click") and function reference (handleClick).
As a result, there won't be any visible output in this context. The event handler is removed, and clicking the button will no longer trigger the handleClick function.
Permalink5) Styling Elements:
Styling elements in JavaScript with the HTML DOM allows you to dynamically modify the CSS properties of elements on a webpage. Here's a detailed explanation:
Permalinka) Accessing Element Styles:
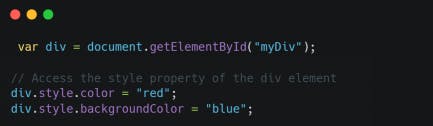
To access and modify the styles of an element, you can use the style property. This property provides access to the inline CSS styles of the element as an object. You can directly assign values to specific style properties to change the element's appearance. Like this:

Permalinkb) Modifying Style Properties:
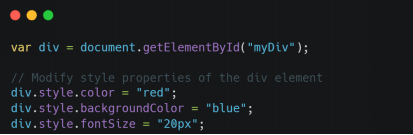
To modify individual style properties of an element, you can directly assign new values to specific style properties using dot notation. The style properties follow the camelCase naming convention, without hyphens like this:
Permalinkc) Adding and Removing CSS Classes:
Instead of modifying individual style properties, you can also add or remove CSS classes to apply predefined styles to elements. This allows for more organized and reusable styling.

Permalinkd) Using CSS Text:
You can also modify an element's entire inline CSS style by assigning a string of CSS declarations to the style.cssText property. This approach is useful when you want to apply multiple style changes at once.


Permalink6) Error Handling:
Error handling in JavaScript and HTML DOM is crucial for gracefully handling unexpected errors and providing a good user experience. Let's explore error-handling techniques in detail, along with simple examples.
Permalinka) Try-Catch Statement:
The try-catch statement is used to catch and handle errors in JavaScript. It allows you to execute a block of code and gracefully handle any exceptions that occur within that block. Here is an example:
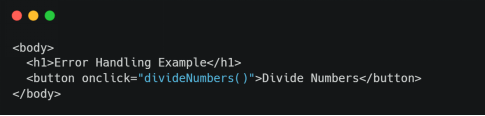
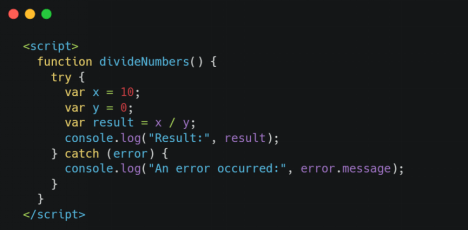
In this example, we attempt to divide two numbers, x, and y, but since the value of y is 0, it will throw a TypeError. We wrap the code within a try block and catch the error using the catch block. If an error occurs, the code within the catch block is executed, and the error message is logged to the console.
Permalinkb) Window.onerror Event:
The window. onerror event is a global event handler that allows you to capture and handle uncaught JavaScript errors. It provides a way to handle errors that occur outside of try-catch blocks.
Here's an example that demonstrates the usage of window.onerror:
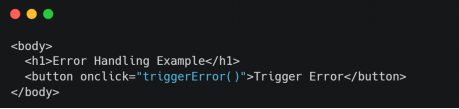
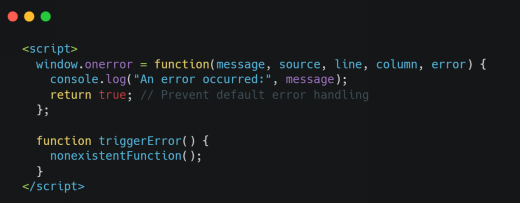
In this example, we define the window.onerror event handler function. It logs the error message to the console and returns true to prevent the default error-handling behavior. When the triggerError() function is called, it attempts to invoke a non-existent function, which triggers an error. The window. onerror event handler catches this error and logs the error message.
PermalinkFinal words:
To sum up, the JavaScript HTML DOM (Document Object Model) is a powerful tool that allows you to manipulate and interact with HTML elements on a webpage. Understanding how to work with the DOM is essential for building dynamic and interactive web applications.
This article covered several important concepts related to the JavaScript HTML DOM, like; Accessing HTML Elements, Modifying HTML Elements, Creating and Appending Elements, Event Handling, Styling Elements, and Error Handling.
By mastering these concepts, you can create dynamic webpages that respond to user interactions, manipulate the content and structure of the page, and apply custom styles to elements.
Thank you!